Friday, December 28, 2007
GAS Alert
I was digging through a pile of old woodworking magazines today and came across the very first on I bought when I took up woodwork. Surprised me how many years I've been doing this (although not THAT many!)
And as I flicked through a few pages I noticed a familiar theme for hobby woodworkers. One that I have noticed on a few woodwork blogs I keep an eye on. And that is the old cry "when I have enough tools and a dream workshop I will start producing stuff".
When I took up woodwork it was to make my own furniture - custom sized to fit my home, built to a higher standard than the rubbish we see in shops and made for less money. And it is way to easy to become distracted from that original goal and become a "tool head". You know, if only I had (insert latest tool release here) I could make that table we want. And we are all guilty of this.
Be honest - how many tools do you REALLY need to make a worthy project? Take a moment to take stock - do you really need 6 routers and 9 smoothing planes........... ;)
It is too easy to be distracted - get in that workshop, sharpen a few tools and MAKE something.
Now pass me that Axminster catalogue......... ;)
Philly
Sunday, December 23, 2007
Merry Christmas
Arghhh!! My worst Blogging month ever!
December has been a crazy month - I've been rushing around like a fool all month and time has just disappeared. I've got lots of ideas flying around my head and look forward to a few days off to get my feet back on the ground so I can get back on track.
Some new plane designs are on the books as well as my latest model.
I've even had some good furniture ideas - I miss making furniture and will be getting stuck in for 2008. And Project Norris needs some time spent on it, too!
But now is the time to relax, have a glass of your favourite tipple and spend time with the family.
Merry Christmas to you all!
Philly
Thursday, December 06, 2007
Where is he?
Thanks to those who have enquired of my health - yes, I am healthy and very much alive ;)
Actually, we've been to Euro Disney on holiday. And survived.......
And then came straight down with a cold. I'm just about over it but it has made for a pretty miserable week.
So - my little review of the Veritas small Plough is out there for anyone who dares to read it. A nice plane, as metal planes go ;)
Just started using a new batch of Beech. Real nice - dense, clean and straight. Pics soon.......
Cheers
Philly
Friday, November 23, 2007
Tool of the Month
One tool that has had a lot of use is my Lie-Nielsen one inch chisel. I've had a set of L-N chisels for a few years and like them a lot. But the largest was 3/4 inch wide - when they released a 1inch model an order was placed immediately!
When it turned up I was quite surprised by the difference in build compared to my existing set - it was huge! Massive, in fact. It seemed strange that there should be such a jump in weight but, I was impressed. Such a flawlessly made tool - I ordered the Cocobolo handle, too :)
Over the months I seem to reach for this chisel more and more. The weight gives it real authority when cutting and I tend to use it on jobs when a smaller chisel might be more useful. I just love it.
Other stuff - my review of the Veritas plough plane is a little delayed due to plane making deadlines. Hopefully I'll get it posted on the weekend.
Cheers
Philly
Wednesday, November 21, 2007
Exciting News....
Hi Folks
Just heard about an exciting hand tool event planned for next Summer.
The venue is West Dean College in Sussex, which looks like a wonderful venue. Confirmed guests so far are Garrett Hack (of "The Handplane Book" fame) and chair maker extraordinaire Brian Boggs - I'm told there will be many more high profile woodworking stars attending, too. As soon as these are confirmed I'll post an update.
The dates are 31st of May and 1st of June 2008 and the event is being sponsored by Classic Hand Tools.
More info when I get get it,
Philly
Monday, November 19, 2007
And more Plough....
Hi Folks
Been spending a little time playing with the new Veritas plough. I'll do a full review soon but thought you might like to hear my first impressions.
When I saw the first photo's on the web of this tool I wasn't too impressed. Veritas are well known for making tools that perform with excellence, but with "looks" a little further down the list of priorities. But in the flesh the plane is prettier, and the sheer high quality of its engineering is impressive.
The main difference between this and a classic metal plough is the method of locking the fence - instead of thumbscrews to lock it down this one has a collet system (rather like the chuck on a drill) that securely grips the fence rods. The precision of this method is impressive - it also keeps the fence parallel to the body. An excellent idea, and well implemented.
I'll come back to the plough later in the week - stay tuned!
Been making a smoother out of some Greenheart - my first time using this timber. It is very dense (I believe it sinks in water!!) and is going to make an excellent plane. Pictures on the way!
Have a good week,
Philly
Sunday, November 11, 2007
Ploughing On
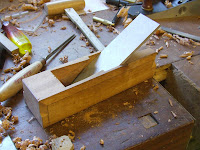
Been pretty busy making planes this week (I know - no surprise!) Made a few shoulder planes (see picture above) with brass soles - can't beat that brass/wood combo for good looks!
Had a delivery from Brimarc too - the new Veritas Plough Plane. Had a quick play with it - a review will be forthcoming. Thought I should get the rest of the ploughs out for comparison - prepare yourselves for a "Plough-fest".
A trip to Yandles yielded some nice 3 inch beech - mostly quartered, too! Had to search though many, many planks to find it but it was worth it. They had lots of Pau Rosa too, which I fancied - sadly it was full of shakes, sap and termite. Maybe next time......;)
I've uncovered the address of another timber yard fairly local to me - if it turns out to be any good I'll let you know the details.
Have a good weeks,
Philly
Tuesday, November 06, 2007
Hail The King!
Had a small gathering at Martin Kings workshop, deep in darkest Dorset. For those who don't know Martin let me just say this - You may think you have a few more tools than you need. Martin will make your workshop look naked ;)
Also present were Waka and Rob "Woodbloke" to round out the morning. Rob was bringing his "Supershiny"tm Record T5 that you may have seen on UK Workshop? And very shiny it was too! Nice one, Rob.
We spent some time opening boxes of tools, delving through humongous amounts of everything, the fruits of Martins busy car boot sale and Auction hunting. And there was pretty much anything you could imagine - my favourite was a beautiful sweetheart #2 Stanley -nice!
Martin's long-suffering tool widow kindly supplied bacon sarnies and plenty of tea's -thanks again!
I came away with a piece of Greenheart from Martins timber stash - keep your eyes peeled for a plane of said timber coming soon.
Cheers
Philly
Friday, November 02, 2007
You Can Never Have Too Many.....
Hi Folks
As a woodworker I tend to accumulate stuff. You know - tools, timber, tools. The odd scar ;)
And sometimes I get a little guilty and worry that the "Collector Police" might be getting ready to make a visit. So I take stock and see if there's anything that, maybe, I could get rid of. Thin things down a little and shove on Ebay.
But I never do. And I'm glad I don't, because every now and again those duplicate tools are exactly what you need for a job.
Remember the Scraper Chisels I mentioned a few blogs ago? I have 1/4 and 3/4 sizes. And they have been so useful. But yesterday I needed a 1/8 wide version - what could I do?? Ahh...get one of my spare 1/8 chisels (I have three) and grind away. Problem solved, work can continue and I don't have to go buy another tool.
And my conscience is soothed for another day. Reminds me of something a certain person says - "Not a collector - just a woodworker with a wide choice of tools"
Now, about those multiple #5's..............;)
Timber is a somewhat important item - without it woodwork just seems to be lacking something ;) And my stocks are getting low- I can actually see an area of floor in the workshop. So a trip to Yandles is called for - anyone going to the open days next week?
Cheers
Philly
Wednesday, October 24, 2007
Norris Update
An update on the Norris restoration....
I've removed the crosspins and screw cap from the plane. This made cleaning up the remaining rust easier. I also made a useful discovery of a rust removal gel that works really well. Here's the link....
With all the rust gone I applied a coat of lacquer to the inside surfaces and a coat of shellac to the outside. I have lots more to do to the outside!
The front bun has been fitted and I need to do the final shaping. But the rear tote need some time spent on it - looking forward to that if I get a spare hour.
I'm really looking forward to putting the plane back together. It may be a while yet, though ;)
Cheers
Phil
Saturday, October 06, 2007
The English Patient
No, don't worry. This is still a "ToolHead" blog ;)
Had an interesting phonecall today from a tool buddy. He put me onto a chap who had a Norris A5 that I might be interested in.
So I called around to see this "beauty". And boy, it was not quite what you might expect!
It was in the bottom of a box of tools the guy had bought at auction. It is badly rusted, missing its iron, has the adjuster snapped off and features huge amount of woodworm. Nice..........
So I have a new project plane - I hope you don't mind if I give it the full "Philly Works"? It certainly needs it and is beyond a simple cleaning and polishing job.
Stay tuned....
Philly
Friday, October 05, 2007
Some Handy PlanemakingTools.
Well with me knocking out planes left right and centre I guess you are board of hearing about it. So let's talk about some tools.
Sorry, I meant tools I use for making planes ;)
First up, the Planemakers Float.
This is a cross between a rasp and a saw, a coarse toothed tool that comes in a variety of shapes and sizes. And indeed, is a tool that you can easily make yourself. In the photo you can see some flashy Lie-Nielsen/Clark and Williams floats. And if you look to the left you will see the skew float I made last week, complete with a file handle.
So how do you use them (and for what?)
These tools excel at opening up partially excavated areas - imagine the area in front of the wedge abutments in a bench plane. Or the wedge mortise in a moulding plane. Drill a hole at the bed angle and then a second one on the breast line - the float then opens the mortise out and squares the sides. And if you are making a skewed iron plane you need a float that has its side skewed by the same amount - this takes all the effort out of this kind of work as it is a self-jigging tool that almost guarantees a perfect result. Just throw in a bit of practise and voila!
You can easily knock up a float in 30 minutes - all you need is a piece of steel (preferably tool steel), a hacksaw and some files. If you've ever tried to sharpen a handsaw then you can make a float no problem! I even found that the random shaping of the teeth I filed in helped to make a smoother cut - bizarre but true! A file handle makes it safe and comfortable to use or you could make your own.
So what are those cheap and nasty looking chisels doing in the photo, you ask?
Tool number two is the Scraper Chisel.
To convert a regular chisel into a scraper takes little work - present the cutting edge squarely into a grinder to flatten the tip a little. The burr raised by the grinder can be left as it helps the cut (this may be familiar if you use scrapers for lathe work). And that's it!
Use the chisel to clean up difficult to reach areas (and there are plenty in a plane!). The back of the chisel is kept flat on the surface and the tip takes fine shavings - it's so good you can't believe it works!
Both of these tools sound simple to use, and they are. But what you can't imagine is how much easier they make the task of planemaking. They literally have transformed the way I make planes, making certain operations quicker and more accurate.
So have a go at making one or both of these tools - you never know where they may come in handy.
Cheers
Philly
Monday, October 01, 2007
Hammer Time
I've been trying out different designs for plane hammers. Sounds simple, doesn't it? A handle with a lump of wood on one end. So there are a wide and varied collection of hammer styles around the workshop. I started off simple and unadorned, gradually introducing beads and swoops, and finally experimenting with exotic timbers.
And I found this - the hard exotics dent the living daylights out of your wooden planes :(
So after much experimenting I have arrived a a hammer I believe is the perfect weight and size, doesn't damage your planes and looks pretty (the last one is somewhat important too!)
What do you think? Curly maple handle and black walnut head, held on with a wedged tenon. And did I mention the wedges are ebony? Now that's a hammer to spoil yourself with ;)
Just finished a small scrub plane for a customer. Made from Pau Rosa, it has a 30mm wide iron which is heavily cambered. And it works great - a real "one-handed" plane. With a heavy cut you can really remove material quickly. But retract the blade a little and you can refine the surface quite nicely, ready for scraping. I hope he'll be happy with is plane :)
Back to the workshop....
Philly
Tuesday, September 25, 2007
A New Idea?
This last week I have had a whole bunch of what you can only call "epiphanies". You know, those moments when the light bulb flicks on?
I've been building a plane for a friend and it involved compound angles. Skew blade, skew bed, angled sole - you know, a real brain bruiser. I've taken a couple of goes at it and I keep sitting awake at night working out how I can make jigs to make production of these features easier. And I have made various clever little gadgets and sliding jigs. But minor errors have made setting these jigs up a costly in time and materials.
So I gave in the other day and made some "Old Timer" jigs - skew floats and wooden blocks to guide a back saw. An hours work, and not a fun hour - how the hell "The Wenz" files saws all day without going blind or mad I'll never know ;)
But with the correct tools it took only a minute to make all the important cuts and then correct any minor errors. A minute!!! And no machinery, no dust extraction. And no brain ache from working out compound angles........
It really humbles me when I have experiences like this - every woodworking problem and situation has been tackled and solved, then refined to its most simple and effective method by our forefathers. And this happened over a hundred (sometimes two hundred) years ago!! Amazing!
So get in that workshop. And when you hit a problem don't reach for that woodworking catalogue to buy the new router jig. Reach for your trusty hand tools and just go for it.
Philly
Sunday, September 16, 2007
First Try....
Hi Folks
Well, here is my completed Try Plane. I have a confession - I originally planned to make this a "Razee" style plane. Made the body, fitted the iron and wedge, shaped the tote. Then it was time to bandsaw off a section at the rear. But my pencil started drawing interesting curves and, before you know it I have come up with this. It is a mix of Stanley Bedrock and classic Infill - I think I'd call it "CRazee".......;)
The plane is made from Bubinga and has a 2 3/8 inch wide iron - pretty big! At 24 inches long I was expecting this plane to be HEAVY. But with the "interesting" shaping the weight has dropped considerably and it feels very pleasant in use. I was unsure about the front strike button - comments from my band of trusty plane testers all said a front grip of some description would be needed. It certainly is needed for easy removal of the wedge without damaging the stock and in use it is perfect for nestling your thumb behind. What do you think?
Have a good week,
Philly
Sunday, September 09, 2007
Show and tell
Had the pleasure of meeting up with Waka, Tony and Bill from UK Workshop for the bi-annual visit to Yandles Woodworking Show. And what a fun day it was........
Yandles has a real inviting atmosphere. Held at a working saw mill (which closes down for the show) it is not a huge show but big enough. And theres plenty to see - as well as lots of interesting timber :)
Needless to say, the boys goaded each other to ever greater heights of tool purchases. It was hilarious to watch. And don't even ask about the manbag...............;)
Back home I've been having yet another workshop change around in the never-ending pursuit of the perfect layout. With my ever expanding planemaking I needed another bench for final fettling and "shipping". So I have now sorted that, as well as making the shop more efficient. Again.
Two more planes are leaving the door - they certain look pretty!
Cheers
Philly
Saturday, September 01, 2007
Flat Out
Been a busy boy in the workshop recently. Planes, planes and planes. Just finished another miter plane and a baby smoother in Pau Rosa. Oh, and a Coffin Smoother in Pau Rosa.
I've made some progress with my Try Plane, too. Bubinga is the timber of choice and what a rock hard timber that is! Needless to say, the planes need a good hone before attempting to slice through it. The #8 has seen a lot of use and I notice that it doesn't seem as heavy as it used to. I must be getting stronger ;)
My favourite thing about using the #8 is "sticktion". It planes surfaces so flat that you can "stick" two pieces together - as you try to pull them apart you can feel them holding together, almost like a vacuum. Now that is flat!!
Got the Philly Forge out the other evening - it's much more fun in the dark! Plus, you can easily tell which colour the steel. And I do love smelling of BBQ ........;)
Konrad Sauer has blogged about his time at Westonbirt - makes for good reading!
Have a great weekend,
Philly
Monday, August 27, 2007
Wonderful Westonbirt
Hi Folks
Spent Saturday at the Festival of the Tree at Westonbirt Arboretum. It was a fantastic day in the most beautiful of surroundings. Needless to say, it has taken top spot for my favorite woodworking show.
There was so much to see - various woodland related demonstrations as well woodturning, crafts, and my favorite - the Classic Hand Tools Marquee! Inside we found a whole lot of good stuff - Martin Brown and Brimarc, John Lloyd, Nick Gibbs, Mike Hancock and at the top end of the tent, the Canadian Invasion. Rob Cosman and Konrad Sauer!!
As usual Rob C was his impressive, inspirational self. His dovetail and M+T demo's were a highlight and I planned to take them both in. But then I met Konrad Sauer, a Gent I'd been looking forward to meeting.
With my interest in planemaking I was eager to have a chat (if possible) . He had a selection of his amazing infill planes with him and was encouraged to try out a couple of smoothers. Effortless, superfine shavings :) I was then able to pick the Man's brain for ages - many thanks for all your advice! I had Waka in tow and needless to say he was hooked. He tried desperately to sneak on home in his pocket . I assume he is at home now, working out how many Norris he needs to sell as we speak.......;)
An extra bonus was Konrad's two hour "Making a Jointer Infill" lesson. Fantastic!!
Needless to say, we left exhausted but enfused. This is THE woodworking show of the year - make sure you note it in your diary for next year. I will be back!
Cheers
Philly
Sunday, August 12, 2007
Forging Ahead.....
HI Folks
Got a few exciting things for you!
First up, the "Philly-Forge". I've been quite happy using a Mapp gas gun to heat treat my irons and it works pretty well - as long as you are using 1/8th thick steel. For my mitre plane I've been using 6mm thick steel and the Mapp gun just can't put out enough heat. So I've trawled through my reference books and the Internet and come up with this. It consists of a wok, a piece of pipe and a hairdryer (I got permission from TPTB to use her hairdryer!!). With charcoal as the fuel it works amazingly well, easily putting out enough heat for my purposes. And all for less than £5, including fuel!
Secondly, I have just sent this little beauty on its way to its new owner. A dovetail plane in Santos Rosewood. It was a lot of work but worth it for the smell of the rosewood alone :)
And finally, big announcement!
As regular visitors will know, I've been making a LOT of planes over the past months. And a lot of folks have asked about buying them. So I have launched "Philly Planes" and you can now order a custom plane of your own. Wish me luck!
Cheers
Philly
Wednesday, August 08, 2007
They Call Me Rose.....
I've finally broken down and used a piece of Rosewood that I have been hoarding. That beautiful plank has been sat in the woodpile waiting for a suitable project to materialize. And here I go.......
After ripping it down on the bandsaw it immediately becomes obvious why it is called Rosewood - the sweet, fragrant scent is very reminiscent of roses. Yum!
Planing. First up was my L-N 4 1/2 with 50 degree frog. Nope. Big tear-out, even with a freshly honed iron. So out comes Mr. Problemsolver, the L-V BUS. With an effective pitch of 62.5 degrees the plane cleaned up the timber with no problems, leaving a shimmering, blemish free surface.
Incidently, the iron was ground at 50 degrees. Now that is one tough angle to sharpen at (using a Veritas MK II honing guide) so I ground a wider bevel on the iron with the Tormek to give more surface area to balance on.
Another tool that works this timber real well is the humble scraper. Effectless shavings that leave a clean surface - the right tools make life somewhat easier!!
So what project is the rosewood for??
Let's just say it has a plane-like flavour.......... ;)
Cheers
Philly
Tuesday, July 31, 2007
The Miter Plane
Here we go, then. The completed plane.
Looks pretty good (IMHO) The chunky chamfers work well. And the weight balance is perfect. I made a skewed iron mitre plane as an experiment and it never felt right. But his one makes me happy - it feels right.
The iron is bedded at 33 degrees. Low enough to be noticeable compared to a standard bench plane but leaving enough wood for strength. And the monster iron is perfect in this instance. Chatter is NOT going to be an issue ;)
I've put more pics here..
Cheers
Philly
Monday, July 30, 2007
How Low Can You Go?
Spent some quality time in the workshop over the weekend. First task - Operation Cleanup!!
Took an hour and a half to get the place half decent but it was well worth it. There's nothing worse than a messy workshop - you can't get things done when you can't find anything :)
So with the workshop renewed I got started on some planes. First up, a plane for a Mate. Lots of headscratching and drawing on scrap and finally I get to resaw some Santos that I've been waiting to use. Lots of flattening and smoothing and the lot went in stick until I'm ready for the challenge.
Next up - a low angle plane. I'd been asked on a forum if it was possible to make a bench plane with a low angle - the feeling was that a wooden plane wouldn't be strong and the bed would collapse. So I did some research, and sure enough there were plenty of examples of low angle planes. Search for Box, Flogger and Miter planes.
Now, if you attempt a 12 degree bed in wood it is going to disintegrate. But that pitch was used in metal planes (and they used the iron bevel up, so when you work out the effective pitch they really weren't low angle planes anyway!) So I went for 33 degrees. That's a much stronger bed, and with the iron bevel down you get a real world 33 degree plane.
I've has some 6mm tool steel lying around - it's pretty OTT for a plane. But I thought it would be perfect for this plane, so out with the hacksaw. And it adds a real heft to the plane - its a heavy iron!
So I'll hopefully have this one finished soon and I'm looking forward to testing it out.
Stay tuned,
Philly
Friday, July 20, 2007
Bash MKII
HI Folks
I'm preparing to make the hike north to Nottingham today (with good friend Waka at the wheel) for Steve M's UK Workshop Bash. The rain is dropping from the sky like a river so I assume we won't be having a BBQ in the garden ;)
For me, the most enjoyable part of these get-togethers is meeting other members and having a chat. It is so much easier "in the flesh" than typing away :)
So if you are considering coming along tomorrow - please do! I'm packing a load of planes and other goodies for all to try.
See you there,
Philly
Wednesday, July 18, 2007
Gluetube......
I was pleased to hear that my little video clips were well received - more are planned. So if there are any topics you want covered let me know!
I was also very flattered to have my "adjusting wooden planes clip" chosen for Fine Woodworkings "Gluetube" video page. Fame at last?
The replacement camera arrives today - I really miss my digital camera.
This weekend is the woodworking Bash at Steve Maskery's workshop in Nottingham. I am really looking forward to meeting up with some old chums and putting "faces to names" :)
Cheers
Philly
Sunday, July 15, 2007
Disaster..........
Nooo........my camera has stopped working!!!!!
I took it to work to take some shots of my latest kitchen refit and nothing happened. Flat batteries I assumed.
Charged the batteries overnight, popped them back in. Ziltch. Nada.
Fitted some new alkaline batteries just to be sure my rechargables hadn't died. Nope.
So my latest video, "Make a plane iron", has to wait until I get my camera repaired (or replaced).
Grrrrr..........:(
Philly
Saturday, July 07, 2007
Moving Pictures.....
HI Folks
I've finally moved into the "video age". My first two video clips are on-line at my website.
They need a bit of polishing but I'm sure they will get better the more I do.
If you have any suggestions for a video clip (woodwork related, please!) then let me know.
Cheers
Philly
I've finally moved into the "video age". My first two video clips are on-line at my website.
They need a bit of polishing but I'm sure they will get better the more I do.
If you have any suggestions for a video clip (woodwork related, please!) then let me know.
Cheers
Philly
Sunday, July 01, 2007
Mark Two.....
Alright, so I changed my mind! The skew mortise was too inaccurate and I was spending too much time fitting the wedge. So my brain kept pushing the lamination idea...........weak, so weak ;)
And here we are - Dado Plane MKII. Made from Goncalo Alves (my fave planemaking wood) it works like a dream. The lamination method lets you easily make clean and accurate mortises. As for strength, I honestly can't see it being a problem. None of my planes has exhibited any signs of weakness along the glue lines - a good sign!
As a special treat (you may disagree....) I made a small (and pretty terrible) video of the plane in action. Have a look here... I feel the WMV version is better.
Needless to say, I will be doing some work on my videomaking. Stay tuned.........
Cheers
Philly
Wednesday, June 27, 2007
Dado's without the Fireworks....
Hi Folks
Haven't made a plane for a week so needed to get my butt back in the workshop. But there was the small question of getting past the door - yup, it was clean up time.
It is quite refreshing to give the old workshop a tidy up. Well o.k., it doesn't feel like it at the time but when all is back in its rightful place it feels good. I have large amounts of 2 inch Oak sat on the floor waiting to be turned into a porch and front door so I still have to work around that. But at least its a reminder ;)
So - the plane. Next up is the Dado Plane. Skew mouth, nicker and depth stop are the inportant features. I thought I'd use Purpleheart as I have had a plank sat around for years - a tough timber indeed. And a real git to work.........
Decided to make it in the traditional way. Chopping skewed mortises........fun, fun, fun. I've done it but I'm not too happy. To be honest I didn't want to laminate this plane. And I have made it in an authentic manner - but boy do I have ever-growing respect for the folk that used to make these for a living.
So only the irons to make and then I can test drive it. And my little brain has already been working out how to make a laminated dado plane - it's make a full set quicker to make AND more accurate.
Watch this space.........
Philly
Friday, June 15, 2007
Taa-Daa!
So here it is - the completed plane! Not the prettiest I've made, but certainly the most testing. I can see why these planes are rare on the second hand market.......;)
The tote was a lot of fun to make - 1/2 an hour with rasps, scrapers and some sandpaper. It is a "four-finger" tote - I've obviously been spending too much time with the Veritas bevel up family ;) I have gone for the vertical grain configuration - I feel this makes for a stronger handle (and Mike Dunbar agrees with me!). The nicker is real high tech - a jig saw blade ground to a crescent profile. The wedge for this needs little real pressure to hold it, which is a good thing - it is a pliers job to remove it!
The main wedge has a simple "Vee" profile - this plane passes such vast shavings it needs all the help it can get. Not pretty but it works. Oh, and the skew blade angle gives you the most bizarre looking wedge you can imagine. It looks very spidery and delicate - treat with care.
So how does it work? Pretty darn well! The sole has a fence built into the left hand side which butts up against the work. The sole isn't sprung so you hold the plane vertical, like a bench plane. And you plane away, trying your best to keep the plane vertical. As the profile emerges the shavings become wider and the plane becomes more difficult to push - I found it was worth taking a ranker cut at the beginning and then resetting the plane to a lighter cut as you near the final shape. The plane features a stop on the right side of the sole so when you reach the completed profile the plane stops cutting - pretty neat! You can vary the width and depth of the profile by tilting the plane (sometimes on purpose!)
So I am happy at last with this plane - it was challenging to make and presented a few head scratchers, but to see it working happily gives me a good feeling.
Plans and step-by-step directions for this plane will be featured in the August issue of "The Woodworker"magazine.
Have a good weekend,
Philly
Tuesday, June 12, 2007
At Last
Finally - I triumph! :)
The panel raising plane is finally doing just that - raising panels!! I was looking forward to making this plane - little did I know how awkward this one would be.
I researched all I could on panel raisers, not having an antique example to examine. I quickly knocked up MK I plane and came across a few problems. Skewing the blade was no problem (keeping the mouth tight WAS) although I underestimated how much skew was needed (the profiling of the sole altered the actual skew angle). My first example suffered from choking badly - I also forgot to cut the mortise for the nicker.....
So, with lessons firmly under the belt I proceeded to MK II. All has been going well (bar the odd little cock-up here and there). Sorted the choking problem, got the nicker set up fine, spent some "quality time" perfecting the profile of the iron. It still wasn't "singing", though. After a while scratching my head and considering taking up golf I went back to the "Plane Problem Sorting 101" guide. Yes, the sole wasn't flat!
No problem - just flatten the sole. Ahh.......the sole is profiled AND features two built in fences. Some time with a shoulder plane and a straight edge sorted that. And then........magic! She started to sing....... :)
I think I'll make the tote and make this plane look pretty, now.
Cheers
Philly
Tuesday, June 05, 2007
Skew
Hi Folks
Had the great idea of finally making a panel raising plane. It's been on the "To-Do" list for a while and I was feeling weak..... ;)
I don't have an example of a vintage one to examine so had to go through whatever reference material I had handy as well as the odd Web search. What do you need in a panel raiser?
A skew blade? No problem. A profiled sole? Can do. A nicker to score the fibres? never made one but why not. So off to the workshop to slice up some wood.
Panel raiser No. 1 came out not quite as well as anticipated. I decided to skew the blade by 14 degrees, which seemed to be plenty. But after profiling the sole (Oh, I did this AFTER laminating the plane - big mistake!) found that the iron seemed to have no effective skew, due to the sole profile. And in my rush to glue the thing up forgot to make the mortise for the nicker - Hah!
The plane did work (after a fashion) but it was obvious how I should improve it. Step up Plane number two.......
This one is coming along much better. I glued the thing together last night so should have it in a workable condition this evening. Hopefully....;)
Cheers
Philly
Wednesday, May 23, 2007
Little Tweaks
So with a few planes under my belt I have noticed a similar occurrence with them all. You build your plane, tweak it, apply a finish. It works well, you go back into the house with a warm feeling and a fine coating of sawdust.
The next day you triumphantly walk into the workshop, master of all tools. Only to find your little wooden plane doesn't work as well as yesterday. Hmm...........scratching of head, a few minor tweaks, a sharpening of the metal bit and the plane works fine again.
This process needs to be repeated at least twice before the plane "settles down". I have found this with all my planes (gotta be approaching twenty, now) Most of the planes refuse to take a fine shaving - this is normally due to a bump appearing behind the mouth. Easily solved with a rub on some sandpaper on a flat surface. Others need a little more work on the wedge. Once you have successfully completed troubleshooting your plane you move up a notch on the "getting better at this" scale.
So please don't get put off if your plane doesn't work consistently. Once you work out how to get it back on track you'll be a better maker. That can only be a good thing!
Cheers
Philly
Tuesday, May 15, 2007
Cap'n Plane
Two weeks without a blog?? Does this mean I have to hand in my Blogger badge?? ;)
The day job has been taking me across the country again - this means two things. One, I'm not at home (so no workshop), and two, when I DO get home I'm exhausted. But you can't keep a good man down......
So here is the next step in my hand plane experiments. A smoother with a cap iron instead of a wedge.
Yes, I have just about mastered the wedge so it was about time to give the cap iron a go. I fitted one to the metal thumb plane I made a little while ago so it was not exactly difficult. I did find that you need an extraordinary amount of precision when drilling the holes for the cross pin - any error makes for a uneven contact with the iron, giving all sorts of headaches.
But I was very impressed with the rigidity of the thing once tightened up. It only takes a small amount of pressure to lock everything down (definitely no twisting away on the knob!!!) And it works impeccably - I was shocked (and disappointed) at how well it performed compared to the amount of work that goes into making a wedged plane. Hum.......
So, the next plane is going to be another toted plane with a cap iron. And maybe an adjuster? Who knows...... ;)
Cheers
Philly
Monday, April 30, 2007
Baby Plane.....
Hi Folks
Finished another plane, this time a baby smoother. Pretty little thing, I am quite taken with it. I am getting quite drawn to smaller smoothers - a #4 1/2 sized woody just doesn't seem right. I;ve put some more pictures here....
Work has been keeping me busy (and tired!!) so I am trying to finish off the mobile base for my tool chest but keep getting sidetracked. I keep picking up a plane and tweaking it, playing with it and making shavings. Not very constructive, I know, but I am learning a lot. As James Krenov mentioned in his books, wooden planes are like finely tuned musical instruments that need to tweaked and fussed over to get the best from them. But once you get them in the zone........ :)
I think I have sussed out fitting the wedge - it takes me little time to get it right, now, and they fit well without needing to be hammered in or out. That's gotta mean something!
Have a good week,
Phil
Saturday, April 21, 2007
Two Parcels....
No, not "two Jags", our beloved (stop laughing at the back!) Deputy PM but two parcels. Delivered, sort of , to Philly Towers.
I use the term "delivered" but really I had to drive to two separate depots to collect these. It's great, the postal service...... ;)
Parcel number one. Some tool steel. Remember that?? Yes, I called Tilgear on Thursday to enquire about my missing tool steel. Seems they forgot to process my order........Not a happy bunny!!! And this is the thanks for recommending them in a national magazine as a supplier.
So I now recommend you DON'T use Tilgear (now known as Nilgear) for tool steel. Try Cromwell or J+L instead, who BOTH have an amazing new interface known as a website. Rant over.......
Parcel number two. After paying Parcel Farce to release my package (from the US so I had to pay duty PLUS £8 to for "handling". I thought the postage was paid on the parcel when it was sent to me - why the hell do we have to pay this??? Especially as I had to drive two miles to collect it myself!!!!???)
I managed to calm down upon opening the parcel as it was from James Krenov. Now I know some folks are not fans of Mr K but I happen to hold him in great esteem. I could never afford a cabinet of his (they go some serious money!) and as his eyesight is failing (he is in his late eighties) he has stopped making cabinets. He is still making the odd hand plane so I emailed his and asked to be put on the waiting list. And here it is......
My first impressions were "mixed" - elated at receiving the plane, disappointed at the rough piece of wood in my hand. But upon getting it in the workshop and using it I quickly realised that the appearance was misleading. The plane performs much better than it looks and it is very comfortable to use. The body is shaped very cleverly - it is asymmetrical and suits a right handed grip perfectly. You can also hold it in many different ways. I am learning a lot from this plane!
Anyway - the weekend is here. I need to make some irons, pronto!
Enjoy the sunshine,
Philly
Wednesday, April 18, 2007
Iron still waiting.......
Tool steel. Yup, still waiting................... :(
Not too happy - Tilgear have had over a week to get my steel sent out and still no show. Hence, no bloggy...........
I have two planes that are pretty much complete. As soon as the steel arrives I'll be able to finish them off and then I'll have some more pretty planes to show.
The weekend past was Yandles time (again!) Shocking how quickly it comes around. It was great to meet up with the crew from UK Workshop - we had a good old time, especially over my latest purchase. Yes, a Lie-Nielsen BRUSH!
Needless to say, such a purchase has led to much mirth. It was worth every penny ;)
I am making up the moulding to trim the tool chest base unit. I hope to veneer up the drawers for this on the coming weekend.
And then I need a new project to get my teeth into. I have a design for a Maloof inspired table to go with the chair I made ages ago. Maybe, maybe......
Cheers
Philly
Tuesday, April 10, 2007
Hi Folks
I know you were expecting finished photo's of the toted smoother. Went out to make the iron yesterday - slight problem on the steel front.......
I've run out of 1/8 tool steel. Plenty of monster 1/4 tool steel (Don't ask!) but I have already made the plane for 1/8 thick stock. So you'll have to wait whist Tilgear get some more sent my way. I gave the plane a good waxing anyway ;)
Back to work!
Philly
Sunday, April 08, 2007
Plane Crazy.........
Thankfully, Sophie is feeling much better today! A day spent relaxing in the sunshine and taking it easy is just what the Doctor ordered. And the workshop is so near.......... ;)
So you know I said I didn't think it was worth building a toted version of the coffin smoother? Yup, I am a sucker for it. Just applied a coat of oil before retiring for the evening. I'll make the iron and wedge tomorrow and get some final pictures for you all.
I was surprised how long it took to make the tote, probably as long as it took me to make the previous plane! I made it as part of the plane, not a glued in piece. That meant all the shaping had to be done in-situ, making things a little trickier. Worth it though.
'til tomorrow,
Philly
Saturday, April 07, 2007
Smooth...
Hi Folks
Been a tough few days - my daughter has been ill. That means four sleepless nights. Yes, I am a little rattled (and Mrs Philly is exhausted too) Hopefully, little one will be back on her feet soon. Hate to have to eat all those chocolate eggs......... ;)
Now, I did grab the odd moment in the 'shop. And this is what I came up with - a coffin smoother.
Named due to the curved shape of its body, not its purpose, it is very comfortable to hold and the timber (Pau Rosa) is very heavy. Perfect!
I'm pretty happy with this plane - it feels like I'm making progress. The smoothing plane is a bit of a holy grail of hand planes. A tight mouth and sharp iron are only part of the story. Feel. How it feels to hold and how it feels in use. The feedback it gives.
I immediately had the thought to make another one with a tote. But using the coffin smoother tells me it just isn't needed. The lack of a handle allows you to hold it in many ways - there is no rigid "you hold it like this" technique, just a tool that can be used the best way for the purpose in hand. Kind of reminds me of Jim Krenov's planes - he made a similar point about not having a tote.
So what next?? Guess I should do some woodwork? Mind you - there's always a plough. Or a panel raiser, or chamfer plane, etc, etc, etc....... :)
have a good weekend,
Phil
Thursday, April 05, 2007
The Slug
Hi Folks
Knocked together another Krenov style plane last night. I was bored, you know ;)
It's no the prettiest plane I've ever made, but to be fair it is something of a testbed.
I wanted to make a 60 degree bevel down plane, and the lamination method is a quick way to make a plane. It came together well, although fitting the wedge took a while. Seems my brass crosspin was a little dented.....
Did it work? Well yes and no. It works well for very fine shavings but is susceptible to the throat clogging. I'm not sure why, yet. There seems to enough space for the shavings to escape yet they still seem to jam up. I will continue to investigate.......
The tool chest mobile base is coming along slowly. The chest is now living on top of the base (with the saw till completing the tower) to be sure it will take the weight. It seems pretty happy so far!
Cheers
Philly
Wednesday, April 04, 2007
Ask No Questions....
Hi Folks
As you can guess from the title, yes, I am fully aware of my blog-lackage.........
So what have I been up to?
Work has been busy. Very busy! And I guess you are pretty board of my day-to-day stuff so lets crack on to the woody stuff.
The Jack. You remember the jack plane? I was very happy with how it came out, how it looked and felt. But when using the "original" if felt so much better than the new one. Why?
No 1:
Weight
No 2:
the way it planed...........
O.k. so the weight thing is down to the timber. Both are beech but my plank of spalted is pretty lightweight. So I can live with that. And maybe use a different timber for a heavyweight version one day. Like soonish!
But in use it just felt very different from my original. And it slowly clicked what the difference was. The camber of the iron!
Now, you may be about to fall asleep at the thought of discussing various radius cambers and their differing properties. And fair due, it sounds boring.
But - and its a big but! The camber makes a huge difference to the "feel" of the plane in use. I love my original jack plane. It cost me £1 from a car boot sale. Its not particularly pretty or well made but it works well, especially after cambered the blade. It is my "go to" plane for cleaning up rough sawn boards (anyone want a scrub??) and quick stock removal (short of the bandsaw)
And it seems I lucked out on the degree of camber I put on the blade. It feels perfect! It removes large shavings, not chips. And tear-out is acceptable for such large stock removal.
So my new jack. It just wasn't right. And the only thing I could think that was different was the blade camber. And it was quite a bit tighter a radius than the original. So I spent an hour or so gently flattening out the camber and re-honing the iron. Testing the cut and appraising it.
Finally I reached a point where performance was exactly the same as my original plane! Joy. And no-one would know of my nerdy radius testing experiments. Until now...... ;)
So what is the radius that feels so "right" to me???
Now that would be nerdy, wouldn't it..... :)
Cheers
Philly
Sunday, March 25, 2007
Jack the lad....
Hi Folks
Finished off the Jack plane yesterday. I was pleased with how well this plane came together - either I was lucky or the Wood Gods were smiling..... ;)
I was interested to compare how it worked and felt next to my favourite wooden Jack. Pretty good feel, lightly than the original (which surprised me) but a good action. The wedge works real well, too. Just a light tap to lock it firmly in place. Nice!
The tool chest base unit is coming along, too. I bolted on the wheels earlier - riding around the workshop on top of it as a "weight test" was a success, I am pleased to say. Need to knock up three drawers (BIG ones!) and some moulding and then the workshop will magically grow larger. It certainly is good to have somewhere to keep things - the place becomes much less cluttered. And any help in that department is a good thing.......;)
Have a good week
Phil
Friday, March 23, 2007
So Where Has He Been?
I know, I know. Ten days with no blogging........ :(
I won't bore you with the excuses but I have been busy - Honest!
To the workshop......
I'm building a Jack Plane. A good old, traditional wooden Jack. But the thought of chiseling out the mortise for the throat left me cold, so, in the best lazy/chicken boy manner I went for lamination.
But of course, I had to try it with a twist! So I have used the Krenov style (two thin outer cheeks sandwiching the bed and toe blocks) but cut the abutments and throat out of the toe block in the traditional style. So now it is glued together it looks like I chiseled it out. Except I just spoiled things by letting you in on the secret..... ;)
I made the rear tote last night - had a lot of fun shaping and smoothing it using rasps. It is surprising how quickly you can work when you have the right tool for the job.
I still have to make the wedge and cut the mortise for the handle so expect to see some completed photo's (complete with "it works!" shavings - hopefully) on the weekend.
Cheers
Philly
Tuesday, March 13, 2007
In Colour.....
Well, here we are! In full "Philovision", for your viewing pleasure ;)
As it was a beautiful sunny day (yes, I even mowed the lawn!) I thought outside was the perfect venue for a photo shoot. Especially as I don't have a studio to take my shots in........
Take a little look here.......
So do you like? I'll take some more shots indoors to get the details but it looks pretty good. The drawer front is lagging behind a little in colour - the rest of the walnut has started to take on that deep glow. Yum!
The drawer action is pretty good for such a wide, narrow drawer. The runners work real good and the closure feature (which pulls the drawer closed over the last 30mm automatically) is a real delight. Everyone who has seen it in the flesh plays with the drawer a few times :)
Onto other things - I have lipped the MDF components of my tool chest base unit with solid walnut and stitched together the veneers ready to press. Should have something to show soon.
Cheers
Philly
Monday, March 12, 2007
Walnut (again!!)
At last, the fluted table is complete!
But before you get too excited, no I don't have some lovely pictures to show you. Sorry - but I will soon!
Saturday saw me in the workshop applying the finishing touches to the table. I was surprised how much the table has changed in colour compared to the drawer front (which has only just received its first coats of oil) Black Walnut ages very nicely, and becomes even more beautiful with time. I was looking at my Maloof inspired chair which is a few years old now and the walnut is just georgous. Sigh......guess I better order some more walnut - and there's me moaning about the sapwood....... ;)
I've started work on the final part of my hand tool storage. I have already completed the tool chest and saw till sections - this will be the base unit (including wheels!) which will sit at the bottom. The chest will sit above with the saw till on top, giving a compact and classy looking unit. Pictures soon......
Have a good week,
Philly
Friday, March 09, 2007
Marking Gauge
Hi Folks
Been spending any spare time in the 'shop making a marking gauge. I know, I know - I don't need another marking gauge. But I bought some brass rod and tube that gave me an idea.......
So here is the Philly marking gauge MK I - not the prettiest thing but an interesting exercise. It needs to be a lot smaller and I may change the shape of the body for the next one (a bit too much Titemark!!) but it works nice. Good practise on the lathe(s) too! Just need to make a suitable cutter.
Thought I'd better get my act together with the fluted table so I have finished making the drawer, glued it up and fitted it. The runners are great, well worth the money and totally hidden. Result! The false front is receiving yet more coats of oil and will be fitted tonight. I also made up some brass adjustable feet to keep the bottom edge of the flutes just off the floor. They are a little delicate so it made sense to raise them a little.
I am pleased with the dovetail arrangement. I think I might use this a lot - what do you think?
Cheers
Philly
Thursday, March 08, 2007
Oil
Hi Folks
The drawer is nearly finished. I veneered a panel for the bottom last night so will be able to assemble the drawer today. The final runner components arrived so I have no excuse!
I've also been working on a home made marking gauge. I epoxied the brass and wood pieces together last night so will be able to see how effective it is today. Pictures soon......
The oil finish on the table has been on there for a few days now. I love the way walnut seems to mellow out once the oil has penetrated. When you first wipe on the finish the wood looks a little excited and there is big variation in the shades and colours. But it now looks more "whole". There is still variation in colour but it just seems to blend together just right.
Does anyone else find this or are the Turps starting to get to me?
Cheers
Phil
Monday, March 05, 2007
Week Excuse....
Hi Folks
I'm back - apologies for the week-long absence. Work has been busy and stressful...........
I have made some progress on the fluted table. The drawer is mostly done (the dovetails, anyway). I decided to use the Blum drawer slides on the table and have been awaiting a couple of parts before I could mount them. Hopefully tomorrow they will arrive and then I can get on with it!
I got a bit fancy with the dovetails. Not sure if I like it or not - need to live with them for a while. It was fun cutting them - I wish I would try and saw to the lines instead of chickening out and leaving some "paring room". I'm no Rob Cosman!
Also fitted a digital readout to my thickness planer. It works a treat (although I had to make up some brackets to mount it). I post some pictures soon.
Cheers
Philly
Tuesday, February 27, 2007
Finishing Time
Hi Folks
My day job continues to be silly busy at the moment - what a difference to the start of the month. One extreme to the other :)
Good news is that I have glued up the main part of the fluted table. Was slightly stressy, as glue-ups seem to be. All went well although I do have a couple of seams that didn't close completely with glue added that DID when dry assembled. Grrr...... Still, a little sawdust and oil soon sorted that out. And talking of oil, I've now put on four coats! And boy does the table look good. The walnut really loves an oil finish :)
Just need to sort out the drawer and I'll be happy.
Cheers
Philly
Subscribe to:
Posts (Atom)