Tuesday, February 27, 2007

Finishing Time


Hi Folks
My day job continues to be silly busy at the moment - what a difference to the start of the month. One extreme to the other :)
Good news is that I have glued up the main part of the fluted table. Was slightly stressy, as glue-ups seem to be. All went well although I do have a couple of seams that didn't close completely with glue added that DID when dry assembled. Grrr...... Still, a little sawdust and oil soon sorted that out. And talking of oil, I've now put on four coats! And boy does the table look good. The walnut really loves an oil finish :)
Just need to sort out the drawer and I'll be happy.
Cheers
Philly

Friday, February 23, 2007

Plane and Simple....


Hi Folks
Friday at last!!
Well this week has been busy, and it certainly is good to be busy when you have to pay the mortgage. You'll also be pleased to hear I managed to spend a little time in the workshop today, too.
First things first - the drawer bottom plane. Done, tested, happy. Some pretty pictures here for you. Made from steamed pear and with an adjustable fence this plane is a copy of one I picked up a while ago. It is a fun plane to use (although it would be better with nickers - cue the MK II version) and so simple its a joy. This one is off to a friend again so I'd better get some more pictures for posterity. ;)

Glued up the remaining bits and pieces of my fluted table. With luck tomorrow will see me gluing the table together leaving just the drawer to complete. I can't wait to get the oil out for this one!
So the weekend is here - enjoy!
Cheers
Phil

Thursday, February 22, 2007

'Shop Time

Hi Folks
It’s been one of those months…....I get to spend lots of time in my workshop making things, having a great time and just enjoying woodwork. But that has been because my day job has been very quiet. And of course, when the day job is quiet you then spend most of the time worrying about the mortgage payment.
The last week has been the opposite – work is now in overdrive and ‘shop time has been minim al (especially as I’m fried when I get home). But hey, at least I know the mortgage payment is covered…..;)
I think somewhere inbetween would be good, so if the ‘ShopGods are listening…...... :)

Managed to work a bit on the table project. It is ready to be glued up and I am about to start work on the drawer. I have ordered some clever Blum drawer glides that should add a touch of class to the project – more details as it comes together!
Work is almost complete on another plane, too. This one is a plane to make grooves for drawer bottoms. It has an adjustable fence built in and is looking pretty good. I’ll post some pictures tomorrow as I have still got to apply the finish.

Cheers
Philly

Sunday, February 18, 2007

Sharp Edge

Hi Folks
Well there goes another weekend! I've not achieved much in the workshop though I have been busy elsewhere. A busy day Saturday replacing some fencing for a friend left me tired and today was spent at Marwell Zoo with the family. So needless to say workshop time has been minimal!
I did spend some time sharpening a few planes. When I'm too tired to do something constructive (without messing it up!!!!) I go for the old fall-back, sharpening.
It never fails to amaze me the difference a freshly sharpened iron makes. Effortless planing, a tear-out free polished surface and a smile on my face. And it really takes so little time. You just have to DO IT ;)
Incidently, I've tried cheating a bit recently. Yes, the "quick hone-up"......
Instead of going through the grits (for me 800, 4000, 10,000) I just try the fine stone or a rub on the strop. It kinda works but doesn't. All you get is an edge that cuts nicely on 90% of its length but has nicks and chips on the remainder. So whats the point? Quite.....
I have a theory that you need to go back to a coarse stone when honing due to the edge becoming "work hardened". This makes it brittle. So if you try to touch it up a few times instead of grinding back to fresh metal you get an edge like I described earlier. Chippy.
I counted out the strokes I take whilst sharpening (as some people feel my prefered method of sharpening, waterstones, is messy and time consuming) Take out coarse stone from water container, rub on flattening plate. 30 seconds. Set iron in jig (Veritas MK2). 30 seconds. Twelve strokes on the 800 stones. Wipe with rag, twelve strokes on the 4000 stones, wipe with rag, twelve strokes on the 10,000 stone. Remove from jig, wipe with oily rag, replace in plane.
Less than three minutes to hone a plane iron to a razor edge (tested on any remaining hand/arm hair I can find!) And sharp enough to leave a perfect, flawless surface that is ready for finishing.
Well worth keeping those tools sharp!
Cheers
Philly

Friday, February 16, 2007

Friday...

Hi Folks
Friday at last. Apologies for a blog not showing lots of interesting stuff and amazing progress shots of my latest dozen projects ;)
The last few weeks have been pretty quiet at work. Grim, actually!
Thanks goodness things have started to pick up - the day job is important. In the same way making the mortgage payment is kind of important....
Downside of being busy at work is I'm cream-crackered when I get home. But at least it's Friday!
Started work on another plane. This time it has a drawer bottom theme.......:)
Have a good weekend
Phil

Wednesday, February 14, 2007

Tool Thoughts.....

Hi Folks
Here's a picture of the rebate plane - I've put full step-by-step pics on my website. Hope you find them useful. Wooden planes are a real pleasure to make and an even bigger pleasure to use! Why is this?
Thinking about it I reckon its for two reasons. One, they are made out of our favorite material and feel warm and inviting in the hand. Low friction, smooth action.
Two, they are all specialised tools.
Why is that important? And isn't that really a negative thing?
The more I work wood the more I realise that tools that are specialised are the ones that work best. A side rebate plane trims the sides of rebates. Very well! It's not a lot of use for anything else but when you want to make a rebate slightly wider its your tool. It's the same for most tools - a smoothing plane is the only tool for final polishing of surfaces. You wouldn't use a jack for that. And at the same time you wouldn't use your smoother to reduce rough sawn boards to dimension.
So you can see that tools that are designed to do ne task, and do it very well are a quick and effective way to work. But does this mean you need a few tools in your tool chest? Yes, I guess it does. But if you are making them yourself it is not exactly breaking the bank, is it? Of course, if you ask Mr L-N to do it for you................... ;)
On another note - I finally took my 1/8th side bead plane out of the freezer (Remember I found some worm holes on the side? It was having the deep freeze treatment to kill off any nasties). Well, I took it out and let it acclimatise to the workshop. Upon removing the clingfilm I managed to knock an egg out of one of the holes. So it was a good thing I got it in the freezer quickly! Needless to say the egg is now dust.
A quick hone of the iron and the side bead was pressed into action. And it worked great -I'm a happy chappy! It does one thing (make a 1/8 wide bead on the edge of a board) but it does it splendidly! Cue satisfied feeling...........;)
Cheers
Philly

Monday, February 12, 2007

The Weekend That Was....

What a busy weekend that was!!!! Saturday saw me up at the crack of dawn for the Alexandra Palace Woodworking Exhibition. Waka and Martin K drove up with me so it was a very enjoyable day. We also met up with various members of UK Workshop - what a crazy bunch of guys :) I put some pictures of the days events here....
I got home at about 6pm and then had to go straight out to play with my Band. Bed at 2:30am........a tired boy indeed!
Sunday was "family day". You know, making up for all that fun ;) No woodwork that day but I have made up for it.
Finished another plane, a simple beech rebate plane this time. I do enjoy making wooden planes, such fun, and a real joy when you see them working. Need to make some more hollow and rounds to fill out my , ah, toolchest. Nearly said the "C" word then.....;)
The fluted table is coming along well. I have finished the table (except the glue!) and made sliding dovetails to take the lower rail. Need to make the drawer and we are there. This is a good looking project, I can't believe it I actually designed it.
Oh, and I have been making a replacement mantlepiece for my Mother-in-laws living room. Steamed pear with a live edge. The oil went on today, pictures once it is in place!
I've been having reports of pictures pushing the text all over the screen so will start putting the photo's at the bottom of the post to see if this helps. Let me either way - cheers!
Philly

Friday, February 09, 2007

Short but Sweet

Hi Folks
Been another busy day in the workshop. And the table has come to life!!!
I'm just off for a bath and an early night (Ally Pally Woodwork show tomorrow so an early start!!!) so thought a little picture would make up for less words ;)
Cheers
Philly

Thursday, February 08, 2007

Busy in the Workshop, Quiet at Work.....


HI Folks
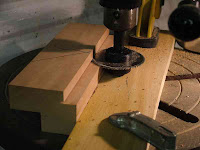
Been deathly quiet at work today - so had a busy day in the workshop instead! The fluted table is coming along FAST! I managed to cut all the corner joinery, taper the legs and rout the fluting. The left side is gluing up in the clamps as we speak. As always, I have some tasty pictures for you.......
It certainly is worth the time to plan your project out in advance. How some folks managed to make it up as they go along I'll never know. The time taken to experiment with the router sled and the flutes would of ruined most of the available walnut..........;)
Had a stroke of luck at my local scrap metal merchants. They had just had a pile of brass in from the local engineering firm. Needless to say, I came away with some cracking offcuts of brass plate for peanuts! Enough for a few plane cap irons and plane sides.......... :)
I've also been doing a little saw sharpening with my new (old) Disston saw vice. Somehow I've managed to make a rip tenon saw that also makes clean crosscuts. Don't know what the heck I've done but I'm pretty pleased. Need to send Mike the Wenz pictures so he can explain how I've messed up :)
One of yesterdays moulding planes had some worm holes - I've popped it in the freezer for a few days to sort the little bleeders out. I fonly I could get that 6 foot plank of Elm in there too.....;)
Cheers
Philly

Wednesday, February 07, 2007

Keep me away from toolshops.....


Hi Folks
Glued on the walnut strips to cover the sapwood today. Cleaned up with a plane and you would never know. Well, unless you look at the ends…..;) It has been a bit of a pain having to deal with the sap problem but at least I can on with things now. And I "beat it" ;) Now I can get started with the corner joint at last! And I know how excited you lot are about that :)
Took a trip to a Pennyfarthing Tools yesterday. Came out with some goodies….....a Disston saw vice for sharpening hand saws (which I’ve been after for AGES!) and four side bead moulding planes. Yet again, one of the planes was a size I’ve been after for a long time. I do love that shop!! :)
Then I popped over to Rob Woodbloke's house to say hello and deliver the shoulder plane. I think he was happy with it - just waiting to hear how he got on with it. It was very interesting to nose round his workshop. I also had a close look at his Elm cabinet - very, very nice and much smaller than you think.He gave me a set of firmer chisel that he had made new handles for. Very nice - thanks Rob!!!
This weekend is the Woodworking Exhibition at Alexandra Palace. I’m taking a couple of buddies up with me so it should be a great day out! It is held in an amazing venue, too. It is almost worth going just to take a look at the architecture (just don't tell anyone I said that) I’ll report back on the action (and Waka's gloatage)
Cheers
Philly

Tuesday, February 06, 2007

Strip Time...


HI Folks
Thought I'd make the "sap covering" strips for the table project last night. Dug out a suitable piece of walnut, planed it smooth and squared an edge. Then wandered over to the bandsaw to rip it into 1/4 inch thick strips.
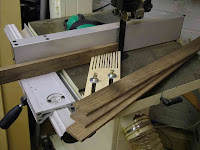
At this point my brain says "hey, wouldn't it be great if you had some fancy featherboard to hold the stock firmly against the fence?" A grand idea, one that was inspired by a visit to a buddys workshop recently (stand up Waka!). So the next half hour was spent fashioning said featherboard instead of making genuine progress on the table. But I do now have a smart little accesory.
It is attached to the table using the mitre gauge slot and applies a good amount of pressure to keep the stock firmly up tight to the fence. This means a more consistent cut and a safer way to work for me - my hands can stay well clear of the blade. It's one of those things that you can't believe you did without. Needless to say it will be getting a lot of use in the future!
I did finish making the strips and then cleaned them up with a plane. Today I'll glue them on and then we can get on with actually "making" the table. At last.......
Today the day the shoulder plane goes to its new owner. I might have to pass by Pennyfarthing Tools just to console myself.....;)
Cheers
Philly

Sunday, February 04, 2007

Another Plane


Hi Folks
Finished another shoulder plane - What do you think?? A pretty little thing (if I do say so myself) ;) It didn't take too long to make, probably 10 hours total. But it works great and looks right. I hope the new owner likes it? I've put some pictures here....
Did a little more work on the new table - final dimensioned alll the stock on the table saw and then planed down the sapwood boards ready for the new pieces of walnut to be glued on. Sadly, that is all I had time to do as I had some painting to do in the house. But you gotta keep the Boss happy, right? ;)
Cheers
Phil