Tuesday, July 28, 2009

Guitars, Gaps and Jointers.....


Hi Folks

Remember the electric guitar project I've been working on? It's just about complete. I've got a couple of small tweaks left to do, but the guitar is playable (and I've been playing it!). I get such a thrill from playing an instrument I bungled together myself - the feeling of shock when I hear it ringing out. And the relief when it is still in one piece five minutes later - when the strings are tuned up to tension I expect the thing to implode any second. I'll post a sound clip soon.

Following the bandsaw blade drama I thought it was time I upgrade another machine that was waiting to "get me". I have a 12 inch disc sander that has become an invaluable tool for me - shaping curves, cleaning up end grain and even shaping metal parts. So I decided to buy a second machine so I could keep one dedicated to metalwork. Sadly the new machine had a large gap (9mm) between the edge of the table and the sanding disc - when working small pieces it is possible (and yes, I've done it) to have the workpiece pulled down through this gap. With the usual underpant threatening consequences.......... ;)
So I fashioned a new table from 3/4 MDF - it only took ten minutes to remove the old one and replace it. And I now have a tiny (read SAFE) gap. I'm so please with this I need to do the other table now (yup, the sander is a double-header).
Plane news.....
It's Jointer season - I'm building a 30 inch beech jointer at the moment (with a similar plane up next). That's a long plane!! More pics as she comes together.

Cheers

Philly

Wednesday, July 22, 2009

New Balls, Please....


Hi Folks
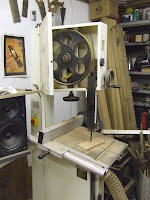
Thought I'd tell you about an "incident" that happened in the workshop today. I was cutting a wedge on the bandsaw in some 15mm thick beech - got halfway through the cut when there was an almighty bang!!
After the initial shock I managed to turn off the power and count my fingers - still all there, I'm pleased to say. And once I'd changed my underpants I was able to investigate further - the blade had snapped.
It's been a while since I've had a blade snap on the bandsaw (three years, in fact) and thinking back I've noticed this blade starting to misbehave. And this was a 25mm wide blade, so a big one - hence the boom when it let go!
But on the up side, it made me realise how safe a machine the bandsaw is. If the blade disintegrated on the table saw it would of been a much nastier outcome, I'm sure.

So with clean underwear fitted I'm ready to venture back into the workshop. I'm working on a new plane at the moment and I'm very, very excited about it. More details in the coming weeks - but its going to be cool!

Cheers

Philly

Saturday, July 11, 2009

Favourite Things Part 2


Finishing is a tricky subject – it can make or break a project. There are many different finishes, and almost as many different ways to apply them. After using most of the types of finish available I find myself reaching for the Shellac nine times out of ten.

So what is shellac? It is a resin excreted by the Lac bug which feeds on braches of certain trees. The resin is harvested and then purified – the different levels of purification give different shades of shellac, from dark brown through to clear. It is dissolved in alcohol (methylated spirit is fine) and by varying the amount of alcohol to shellac (or the “cut”) you can get different strength solutions (i.e. thicker for bodying up).

Shellac has some excellent traits :

  • It will bond to pretty much anything
  • It dries very fast
  • No strong smell
  • Easily removed – just wipe off with an alcohol soaked rag.
  • Each application melts into previous layers, so no problems with “sand through”
  • Most other finishes will bond to it, so it can be used as a sealer (i.e. between an oil based finish and a water based finish)

For me one of the best things about shellac is its versatility – you can wipe on a single thing coat to seal the timber against fingerprints (think Jim Krenov’s method of finishing) or you can continue to add layers of finish to get the desired sheen or thickness. And the speed with which it dries means you can make some serious progress – no waiting overnight for the finish to cure. Only a couple of minutes are needed for it to be dry.

Ease of application is another plus – I’ve used paper towels, rags, mini-rollers and brushes. You can also spray it, but I’ve never felt the need to.

So what downsides are there to shellac? Well, it is dissolved in alcohol, so shellac probably wouldn’t make the best finish for a bar top – a few splashed drops of whiskey would spell disaster. Its also not water proof, so is only suitable for indoor use. But that’s about it.

Shellac is a wonderful finish for wood – it brings out the beauty of the grain and figure and makes it shine. It is a natural finish that has been used for centuries and just looks “right”. My favourite technique is to apply a coat of oil to the piece, buff it dry and then apply shellac. This gives a deep shine and makes the figuring jump out at you. And its quick and easy to do!

One final comment – there are many different shades of shellac. Experiment with them on different colour timbers – I love garnet on walnut, and lemon adds an interesting “vintage” tint to most timbers.
Wednesday, July 08, 2009

Favourite Things Part 1


Hi Folks

I thought over the next week I would blog about some of my favourite things. But don't worry, its about simple, useful (and cheap!) things around the workshop that I use everyday and wouldn't be without.

So to the first item - Superglue.

I'm sure most of us have used superglue at one time or another (and have a bad memory of sticking your fingers to the item to be repaired!). Its cheap, easily available and dries fast.
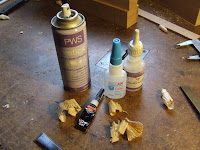
I was interested to find it comes in different thicknesses - I'd only used the regular stuff. You can get a thick gel version (which doesn't run - useful on vertical surfaces) and a low viscosity thin version, too. The thin stuff has become a workshop favourite of mine - it has hundreds of uses. The cool thing is this - due to its watery consistency it wicks into cracks and openings. So you can sit two pieces together then wick the glue in afterwards - cool! And it also draws itself into cracks, so the next time you have a piece of timber chip or split just let some glue seep its way in and then hold the chip down for a few seconds until it sets. Perfect repair!

Over in the guitar making world repair guys use superglue for many, many things. And turners also use superglue as a finish! Is there no end of uses for this wonderful stuff?

A perfect companion to superglue is accelerator - just spray one surface with it before putting the two parts together and the glue sets almost instantly. Or you can use a drop of accelerator to set a layer of glue before adding another, allowing you to build up a repair quickly.

So - some of my applications for superglue:

As a filler - just add sawdust.
For gluing metal to wood.
Repairing splits, checks and cracks.
To glue up quick jigs.
To temporarily tack pieces together (pry them apart within 10 minutes though)
To strengthen soft areas of timber.
As a thread lock.

For me the best attribute is speed - apply the glue, hold the pieces together for a few seconds - done! And its a surprisingly strong bond, too, once it cures fully.
Just remember not to glue your fingers together - maybe an emergency tube of superglue dissolver would be a good thing to add to the list.

Cheers

Philly