Tuesday, September 25, 2007

A New Idea?


This last week I have had a whole bunch of what you can only call "epiphanies". You know, those moments when the light bulb flicks on?

I've been building a plane for a friend and it involved compound angles. Skew blade, skew bed, angled sole - you know, a real brain bruiser. I've taken a couple of goes at it and I keep sitting awake at night working out how I can make jigs to make production of these features easier. And I have made various clever little gadgets and sliding jigs. But minor errors have made setting these jigs up a costly in time and materials.

So I gave in the other day and made some "Old Timer" jigs - skew floats and wooden blocks to guide a back saw. An hours work, and not a fun hour - how the hell "The Wenz" files saws all day without going blind or mad I'll never know ;)

But with the correct tools it took only a minute to make all the important cuts and then correct any minor errors. A minute!!! And no machinery, no dust extraction. And no brain ache from working out compound angles........

It really humbles me when I have experiences like this - every woodworking problem and situation has been tackled and solved, then refined to its most simple and effective method by our forefathers. And this happened over a hundred (sometimes two hundred) years ago!! Amazing!

So get in that workshop. And when you hit a problem don't reach for that woodworking catalogue to buy the new router jig. Reach for your trusty hand tools and just go for it.

Philly

Sunday, September 16, 2007

First Try....


Hi Folks
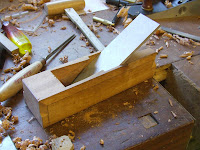
Well, here is my completed Try Plane. I have a confession - I originally planned to make this a "Razee" style plane. Made the body, fitted the iron and wedge, shaped the tote. Then it was time to bandsaw off a section at the rear. But my pencil started drawing interesting curves and, before you know it I have come up with this. It is a mix of Stanley Bedrock and classic Infill - I think I'd call it "CRazee".......;)
The plane is made from Bubinga and has a 2 3/8 inch wide iron - pretty big! At 24 inches long I was expecting this plane to be HEAVY. But with the "interesting" shaping the weight has dropped considerably and it feels very pleasant in use. I was unsure about the front strike button - comments from my band of trusty plane testers all said a front grip of some description would be needed. It certainly is needed for easy removal of the wedge without damaging the stock and in use it is perfect for nestling your thumb behind. What do you think?
Have a good week,
Philly

Sunday, September 09, 2007

Show and tell

Had the pleasure of meeting up with Waka, Tony and Bill from UK Workshop for the bi-annual visit to Yandles Woodworking Show. And what a fun day it was........
Yandles has a real inviting atmosphere. Held at a working saw mill (which closes down for the show) it is not a huge show but big enough. And theres plenty to see - as well as lots of interesting timber :)
Needless to say, the boys goaded each other to ever greater heights of tool purchases. It was hilarious to watch. And don't even ask about the manbag...............;)
Back home I've been having yet another workshop change around in the never-ending pursuit of the perfect layout. With my ever expanding planemaking I needed another bench for final fettling and "shipping". So I have now sorted that, as well as making the shop more efficient. Again.
Two more planes are leaving the door - they certain look pretty!
Cheers
Philly

Saturday, September 01, 2007

Flat Out


Been a busy boy in the workshop recently. Planes, planes and planes. Just finished another miter plane and a baby smoother in Pau Rosa. Oh, and a Coffin Smoother in Pau Rosa.
I've made some progress with my Try Plane, too. Bubinga is the timber of choice and what a rock hard timber that is! Needless to say, the planes need a good hone before attempting to slice through it. The #8 has seen a lot of use and I notice that it doesn't seem as heavy as it used to. I must be getting stronger ;)
My favourite thing about using the #8 is "sticktion". It planes surfaces so flat that you can "stick" two pieces together - as you try to pull them apart you can feel them holding together, almost like a vacuum. Now that is flat!!
Got the Philly Forge out the other evening - it's much more fun in the dark! Plus, you can easily tell which colour the steel. And I do love smelling of BBQ ........;)
Konrad Sauer has blogged about his time at Westonbirt - makes for good reading!
Have a great weekend,
Philly

Monday, August 27, 2007

Wonderful Westonbirt


Hi Folks
Spent Saturday at the Festival of the Tree at Westonbirt Arboretum. It was a fantastic day in the most beautiful of surroundings. Needless to say, it has taken top spot for my favorite woodworking show.
There was so much to see - various woodland related demonstrations as well woodturning, crafts, and my favorite - the Classic Hand Tools Marquee! Inside we found a whole lot of good stuff - Martin Brown and Brimarc, John Lloyd, Nick Gibbs, Mike Hancock and at the top end of the tent, the Canadian Invasion. Rob Cosman and Konrad Sauer!!
As usual Rob C was his impressive, inspirational self. His dovetail and M+T demo's were a highlight and I planned to take them both in. But then I met Konrad Sauer, a Gent I'd been looking forward to meeting.
With my interest in planemaking I was eager to have a chat (if possible) . He had a selection of his amazing infill planes with him and was encouraged to try out a couple of smoothers. Effortless, superfine shavings :) I was then able to pick the Man's brain for ages - many thanks for all your advice! I had Waka in tow and needless to say he was hooked. He tried desperately to sneak on home in his pocket . I assume he is at home now, working out how many Norris he needs to sell as we speak.......;)
An extra bonus was Konrad's two hour "Making a Jointer Infill" lesson. Fantastic!!
Needless to say, we left exhausted but enfused. This is THE woodworking show of the year - make sure you note it in your diary for next year. I will be back!
Cheers
Philly

Sunday, August 12, 2007

Forging Ahead.....


HI Folks

Got a few exciting things for you!

First up, the "Philly-Forge". I've been quite happy using a Mapp gas gun to heat treat my irons and it works pretty well - as long as you are using 1/8th thick steel. For my mitre plane I've been using 6mm thick steel and the Mapp gun just can't put out enough heat. So I've trawled through my reference books and the Internet and come up with this. It consists of a wok, a piece of pipe and a hairdryer (I got permission from TPTB to use her hairdryer!!). With charcoal as the fuel it works amazingly well, easily putting out enough heat for my purposes. And all for less than £5, including fuel!

Secondly, I have just sent this little beauty on its way to its new owner. A dovetail plane in Santos Rosewood. It was a lot of work but worth it for the smell of the rosewood alone :)

And finally, big announcement!

As regular visitors will know, I've been making a LOT of planes over the past months. And a lot of folks have asked about buying them. So I have launched "Philly Planes" and you can now order a custom plane of your own. Wish me luck!

Cheers

Philly

Wednesday, August 08, 2007

They Call Me Rose.....


I've finally broken down and used a piece of Rosewood that I have been hoarding. That beautiful plank has been sat in the woodpile waiting for a suitable project to materialize. And here I go.......
After ripping it down on the bandsaw it immediately becomes obvious why it is called Rosewood - the sweet, fragrant scent is very reminiscent of roses. Yum!
Planing. First up was my L-N 4 1/2 with 50 degree frog. Nope. Big tear-out, even with a freshly honed iron. So out comes Mr. Problemsolver, the L-V BUS. With an effective pitch of 62.5 degrees the plane cleaned up the timber with no problems, leaving a shimmering, blemish free surface.
Incidently, the iron was ground at 50 degrees. Now that is one tough angle to sharpen at (using a Veritas MK II honing guide) so I ground a wider bevel on the iron with the Tormek to give more surface area to balance on.
Another tool that works this timber real well is the humble scraper. Effectless shavings that leave a clean surface - the right tools make life somewhat easier!!
So what project is the rosewood for??
Let's just say it has a plane-like flavour.......... ;)
Cheers
Philly

Tuesday, July 31, 2007

The Miter Plane


Here we go, then. The completed plane.
Looks pretty good (IMHO) The chunky chamfers work well. And the weight balance is perfect. I made a skewed iron mitre plane as an experiment and it never felt right. But his one makes me happy - it feels right.
The iron is bedded at 33 degrees. Low enough to be noticeable compared to a standard bench plane but leaving enough wood for strength. And the monster iron is perfect in this instance. Chatter is NOT going to be an issue ;)
I've put more pics here..
Cheers
Philly

Monday, July 30, 2007

How Low Can You Go?


Spent some quality time in the workshop over the weekend. First task - Operation Cleanup!!
Took an hour and a half to get the place half decent but it was well worth it. There's nothing worse than a messy workshop - you can't get things done when you can't find anything :)
So with the workshop renewed I got started on some planes. First up, a plane for a Mate. Lots of headscratching and drawing on scrap and finally I get to resaw some Santos that I've been waiting to use. Lots of flattening and smoothing and the lot went in stick until I'm ready for the challenge.
Next up - a low angle plane. I'd been asked on a forum if it was possible to make a bench plane with a low angle - the feeling was that a wooden plane wouldn't be strong and the bed would collapse. So I did some research, and sure enough there were plenty of examples of low angle planes. Search for Box, Flogger and Miter planes.
Now, if you attempt a 12 degree bed in wood it is going to disintegrate. But that pitch was used in metal planes (and they used the iron bevel up, so when you work out the effective pitch they really weren't low angle planes anyway!) So I went for 33 degrees. That's a much stronger bed, and with the iron bevel down you get a real world 33 degree plane.
I've has some 6mm tool steel lying around - it's pretty OTT for a plane. But I thought it would be perfect for this plane, so out with the hacksaw. And it adds a real heft to the plane - its a heavy iron!
So I'll hopefully have this one finished soon and I'm looking forward to testing it out.
Stay tuned,
Philly

Friday, July 20, 2007

Bash MKII


HI Folks
I'm preparing to make the hike north to Nottingham today (with good friend Waka at the wheel) for Steve M's UK Workshop Bash. The rain is dropping from the sky like a river so I assume we won't be having a BBQ in the garden ;)
For me, the most enjoyable part of these get-togethers is meeting other members and having a chat. It is so much easier "in the flesh" than typing away :)
So if you are considering coming along tomorrow - please do! I'm packing a load of planes and other goodies for all to try.
See you there,
Philly

Wednesday, July 18, 2007

Gluetube......

I was pleased to hear that my little video clips were well received - more are planned. So if there are any topics you want covered let me know!
I was also very flattered to have my "adjusting wooden planes clip" chosen for Fine Woodworkings "Gluetube" video page. Fame at last?
The replacement camera arrives today - I really miss my digital camera.
This weekend is the woodworking Bash at Steve Maskery's workshop in Nottingham. I am really looking forward to meeting up with some old chums and putting "faces to names" :)
Cheers
Philly

Sunday, July 15, 2007

Disaster..........

Nooo........my camera has stopped working!!!!!
I took it to work to take some shots of my latest kitchen refit and nothing happened. Flat batteries I assumed.
Charged the batteries overnight, popped them back in. Ziltch. Nada.
Fitted some new alkaline batteries just to be sure my rechargables hadn't died. Nope.
So my latest video, "Make a plane iron", has to wait until I get my camera repaired (or replaced).
Grrrrr..........:(
Philly

Saturday, July 07, 2007

Moving Pictures.....

HI Folks
I've finally moved into the "video age". My first two video clips are on-line at my website.
They need a bit of polishing but I'm sure they will get better the more I do.
If you have any suggestions for a video clip (woodwork related, please!) then let me know.
Cheers
Philly

Sunday, July 01, 2007

Mark Two.....


Alright, so I changed my mind! The skew mortise was too inaccurate and I was spending too much time fitting the wedge. So my brain kept pushing the lamination idea...........weak, so weak ;)
And here we are - Dado Plane MKII. Made from Goncalo Alves (my fave planemaking wood) it works like a dream. The lamination method lets you easily make clean and accurate mortises. As for strength, I honestly can't see it being a problem. None of my planes has exhibited any signs of weakness along the glue lines - a good sign!
As a special treat (you may disagree....) I made a small (and pretty terrible) video of the plane in action. Have a look here... I feel the WMV version is better.
Needless to say, I will be doing some work on my videomaking. Stay tuned.........
Cheers
Philly

Wednesday, June 27, 2007

Dado's without the Fireworks....


Hi Folks
Haven't made a plane for a week so needed to get my butt back in the workshop. But there was the small question of getting past the door - yup, it was clean up time.
It is quite refreshing to give the old workshop a tidy up. Well o.k., it doesn't feel like it at the time but when all is back in its rightful place it feels good. I have large amounts of 2 inch Oak sat on the floor waiting to be turned into a porch and front door so I still have to work around that. But at least its a reminder ;)
So - the plane. Next up is the Dado Plane. Skew mouth, nicker and depth stop are the inportant features. I thought I'd use Purpleheart as I have had a plank sat around for years - a tough timber indeed. And a real git to work.........
Decided to make it in the traditional way. Chopping skewed mortises........fun, fun, fun. I've done it but I'm not too happy. To be honest I didn't want to laminate this plane. And I have made it in an authentic manner - but boy do I have ever-growing respect for the folk that used to make these for a living.
So only the irons to make and then I can test drive it. And my little brain has already been working out how to make a laminated dado plane - it's make a full set quicker to make AND more accurate.
Watch this space.........
Philly

Friday, June 15, 2007

Taa-Daa!


So here it is - the completed plane! Not the prettiest I've made, but certainly the most testing. I can see why these planes are rare on the second hand market.......;)
The tote was a lot of fun to make - 1/2 an hour with rasps, scrapers and some sandpaper. It is a "four-finger" tote - I've obviously been spending too much time with the Veritas bevel up family ;) I have gone for the vertical grain configuration - I feel this makes for a stronger handle (and Mike Dunbar agrees with me!). The nicker is real high tech - a jig saw blade ground to a crescent profile. The wedge for this needs little real pressure to hold it, which is a good thing - it is a pliers job to remove it!
The main wedge has a simple "Vee" profile - this plane passes such vast shavings it needs all the help it can get. Not pretty but it works. Oh, and the skew blade angle gives you the most bizarre looking wedge you can imagine. It looks very spidery and delicate - treat with care.
So how does it work? Pretty darn well! The sole has a fence built into the left hand side which butts up against the work. The sole isn't sprung so you hold the plane vertical, like a bench plane. And you plane away, trying your best to keep the plane vertical. As the profile emerges the shavings become wider and the plane becomes more difficult to push - I found it was worth taking a ranker cut at the beginning and then resetting the plane to a lighter cut as you near the final shape. The plane features a stop on the right side of the sole so when you reach the completed profile the plane stops cutting - pretty neat! You can vary the width and depth of the profile by tilting the plane (sometimes on purpose!)
So I am happy at last with this plane - it was challenging to make and presented a few head scratchers, but to see it working happily gives me a good feeling.
Plans and step-by-step directions for this plane will be featured in the August issue of "The Woodworker"magazine.
Have a good weekend,
Philly

Tuesday, June 12, 2007

At Last


Finally - I triumph! :)
The panel raising plane is finally doing just that - raising panels!! I was looking forward to making this plane - little did I know how awkward this one would be.
I researched all I could on panel raisers, not having an antique example to examine. I quickly knocked up MK I plane and came across a few problems. Skewing the blade was no problem (keeping the mouth tight WAS) although I underestimated how much skew was needed (the profiling of the sole altered the actual skew angle). My first example suffered from choking badly - I also forgot to cut the mortise for the nicker.....
So, with lessons firmly under the belt I proceeded to MK II. All has been going well (bar the odd little cock-up here and there). Sorted the choking problem, got the nicker set up fine, spent some "quality time" perfecting the profile of the iron. It still wasn't "singing", though. After a while scratching my head and considering taking up golf I went back to the "Plane Problem Sorting 101" guide. Yes, the sole wasn't flat!
No problem - just flatten the sole. Ahh.......the sole is profiled AND features two built in fences. Some time with a shoulder plane and a straight edge sorted that. And then........magic! She started to sing....... :)
I think I'll make the tote and make this plane look pretty, now.
Cheers
Philly

Tuesday, June 05, 2007

Skew


Hi Folks
Had the great idea of finally making a panel raising plane. It's been on the "To-Do" list for a while and I was feeling weak..... ;)
I don't have an example of a vintage one to examine so had to go through whatever reference material I had handy as well as the odd Web search. What do you need in a panel raiser?
A skew blade? No problem. A profiled sole? Can do. A nicker to score the fibres? never made one but why not. So off to the workshop to slice up some wood.
Panel raiser No. 1 came out not quite as well as anticipated. I decided to skew the blade by 14 degrees, which seemed to be plenty. But after profiling the sole (Oh, I did this AFTER laminating the plane - big mistake!) found that the iron seemed to have no effective skew, due to the sole profile. And in my rush to glue the thing up forgot to make the mortise for the nicker - Hah!
The plane did work (after a fashion) but it was obvious how I should improve it. Step up Plane number two.......
This one is coming along much better. I glued the thing together last night so should have it in a workable condition this evening. Hopefully....;)
Cheers
Philly

Wednesday, May 23, 2007

Little Tweaks

So with a few planes under my belt I have noticed a similar occurrence with them all. You build your plane, tweak it, apply a finish. It works well, you go back into the house with a warm feeling and a fine coating of sawdust.
The next day you triumphantly walk into the workshop, master of all tools. Only to find your little wooden plane doesn't work as well as yesterday. Hmm...........scratching of head, a few minor tweaks, a sharpening of the metal bit and the plane works fine again.
This process needs to be repeated at least twice before the plane "settles down". I have found this with all my planes (gotta be approaching twenty, now) Most of the planes refuse to take a fine shaving - this is normally due to a bump appearing behind the mouth. Easily solved with a rub on some sandpaper on a flat surface. Others need a little more work on the wedge. Once you have successfully completed troubleshooting your plane you move up a notch on the "getting better at this" scale.
So please don't get put off if your plane doesn't work consistently. Once you work out how to get it back on track you'll be a better maker. That can only be a good thing!
Cheers
Philly

Tuesday, May 15, 2007

Cap'n Plane


Two weeks without a blog?? Does this mean I have to hand in my Blogger badge?? ;)
The day job has been taking me across the country again - this means two things. One, I'm not at home (so no workshop), and two, when I DO get home I'm exhausted. But you can't keep a good man down......
So here is the next step in my hand plane experiments. A smoother with a cap iron instead of a wedge.
Yes, I have just about mastered the wedge so it was about time to give the cap iron a go. I fitted one to the metal thumb plane I made a little while ago so it was not exactly difficult. I did find that you need an extraordinary amount of precision when drilling the holes for the cross pin - any error makes for a uneven contact with the iron, giving all sorts of headaches.
But I was very impressed with the rigidity of the thing once tightened up. It only takes a small amount of pressure to lock everything down (definitely no twisting away on the knob!!!) And it works impeccably - I was shocked (and disappointed) at how well it performed compared to the amount of work that goes into making a wedged plane. Hum.......
So, the next plane is going to be another toted plane with a cap iron. And maybe an adjuster? Who knows...... ;)
Cheers
Philly